
Fix Windows 10 100% disk usage problem:
Windows 10 is the latest version of the operating system Microsoft has released. It has awesome features and upgrades such as security upgrades, improved speed, and usability. Thus, making your work easier and safer.
Yet, there are issues that users experience such as spike of disk usage.
Today, I’m going to provide solutions to this specific issue.
Let’s start with the simplest fix.
Step 1: Restart your System
Restarting your PC resolves common issues on your computer, this might help you fix this one. You may save this page by bookmarking it or copying the post link so you could quickly get back in here.
If this does not resolve the issue, please proceed.
Step 2: Run Check Disk.
Running chkdisk fixes most common issues you experience in Windows operating system, including Disk Usage issue. This also helps fix and correct errors on your disk.
1. Please go to your Start and type ThisPC
2. Select the drive you want to run a check on
3. Right-click on the drive
4. Click Properties
5. Go to the Tools tab
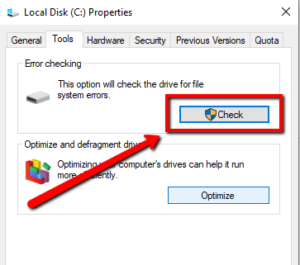
6. Select Check
7. Scan Drive
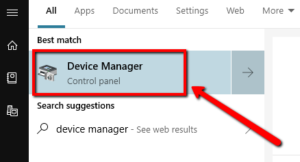
Step 3: Update your Device Drivers
By updating your device drivers it helps you fix common issues such as disk usage issue, and others.
1. Please go to your Start
2. Then type Device Manager, click the top result to open the app
3. Expand the category with the hardware you want to update
(You may update all your drivers, you can do it one by one)
4. Right-click the device, and select Update Driver
5. Click the Search automatically for updated driver software option
Complete Instructions to Update Windows 10 Drivers
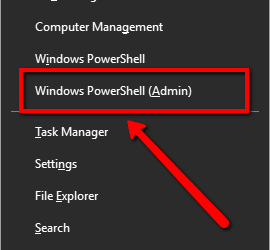
Step 4: Disable SuperFetch
Superfetch is a service of Windows, this specific app’s function is to make your programs launch faster by pre-loading the app from your RAM. You can try to disable this and see if this fixes the issue.
1. On your keyboard, please press Windows key + X at the same time
2. Then choose Command Prompt (Admin) or Windows Powershell (Admin)
3. Click Yes at the User Account Control prompt
4. The command prompt will pop-up. Type in the following command:
net.exe stop SuperFetch
5. Press Enter
Step 5: Disable Window Search
Windows Search is also a service from Microsoft that constantly runs on the background, looking for file paths and locations. It helps you to find files faster by typing it on the Start Search Menu. However, the disadvantage of this one is it consumes system resources, resulting in high CPU or disk usage, thus slowing your system down.
1. Please go to your Start
2. Type Run
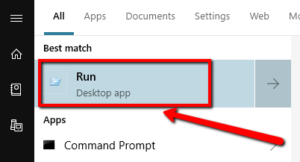
3. Select the App
4. On run type services.msc and press Enter.
5. You will see the Services window
6. Select the Windows Search entry and double-click
7. You will see the Properties
8. Select Disabled under Startup type and the OK to save your changes
I hope this helps you with the issue you are experiencing.
Have a good one!